Our very own Sandy stars in this knitting instructional video about how to do a cable cast on. We hope you enjoy it!
How to do a Cable Cast-on
This is one of Sandy's favorite cast-ons. She taught herself how to do a cable cast-on with the instructions from the Vogue Big Book, a book she wouldn't be without! When casting-on, Sandy hates to not have enough yarn to complete a long tail cast-on or to waste yarn by having way too much tail left over. So a cable cast-on is the perfect solution! It makes a firm, less stretchy edge that is perfect when there is no ribbing at the beginning of your project.
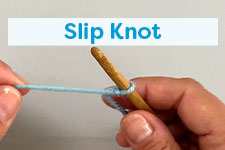
- Start by making a slip knot and slipping it onto your left needle.
- Insert your right-hand needle into the slip stitch as if to knit, wrap and pull a loop through, twist away from you and then slip the newly made stitch onto the left hand needle.
- Now that you have your first two stitches on your left hand needle, insert your right-hand needle between the stitches, wrap the yarn as if to knit and pull a loop through, twist away from you and then slip the newly made stitch onto the left-hand needle.
- Continue to insert your right-hand needle between the stitches, wrap the yarn as if to knit and pull a loop through, twist away from you and then slip the newly made stitch onto the left-hand needle until you have the desired number of stitches.
Hint:
Insert your right-hand needle between the stitches before you tighten up the last stitch made. This takes the struggle out of inserting your needle between the stitches.
This cast-on give a lovely twisted look to your edge. If you slip your newly made stitches from the right-hand needle to the left straight across it gives a softer twist and when you transfer your stitches giving them a twist, as Sandy does, it makes a firmer twist on the edge. Knitter's choice!
Happy Knitting!
Posted by Doug of Jimmy Beans Wool


