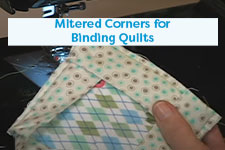
Jeanne from Jimmy Beans Wool demonstrates how to iron a sewn seam flat.
How to Iron a Seam Flat
Jeanne has been working on quilts lately and thought she would show you how to iron a seam flat. In quiliting it's common to use 1/4" seam allowances. In many other types of projects a 1/2" seam allowance is more common and a little easier to iron flat because you have a bit more fabric to hold on to. Ironing seams flat helps to make your sewn project look more finished, smooths out puckers and sets the stitches so that they become integral to the fabric.
After you have sewn your seam:
- Take your work to your ironing board and lay it out with the right side of the fabric facing down and the seam up.
- Make sure your iron is hot.
- Open up the seam allowance an inch or two and use the index finger of the hand you won't be ironing with to hold it open.
- With the pointed tip of your iron, start at the very edge of the fabric and gently begin to iron the seam flat.
- With your free finger a couple of inches ahead of the iron, continue to open up the seam. (Be careful to keep it out of the way of the iron!)
- You can check the right side of the fabric to make sure you're getting the seam flat.
- Continue the full length of the seam until the whole thing is ironed flat.
- Go slowly and carefully, pulling your fabric out as needed.
And that's how you iron a seam flat, it's that simple! Have fun and learn something new everyday!


