The knitted cast on method is great for those projects that require a ton of stitches (like the Sideways Scarf), because you don't have to try and guess how much yarn to use for the cast-on. You'll also notice that your first row after a knitted cast-on is a right side row, whereas the first row after the Long-Tail cast-on is a wrong side row.
The down side to this cast on method is that it really helps to know how to knit, since that's basically what you are doing: knitting stitches onto the needle. As such, you'll see similarities in the instructions here and the instructions for the Knit Stitch.
 |
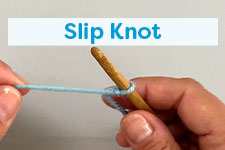
Step 1: Create a slip knot and put it on your needle. |
 |
Step 2: Put that needle in your left hand. Insert the tip of the other needle into the stitch on the left needle... |
 |
Step 3: Using the yarn leading to the ball, loop (or 'throw' as some knitters say) the yarn around the empty needle in a counter clockwise fashion. I like to think of it as looping the yarn from "left to right" or "under, then over." |
 |
Step 4: In this step, you are going to pull the piece of yarn that you just threw over the needle through the loop on the left needle. (hint: hold the yarn taut against the needle & it won't slip off.) |
 
|
Step 5: Using the right needle, stretch that loop out (that you just created) and place it on the end of the left needle. Remove the right needle & pull that new stitch tight, but not too tight. |
 |
Step 6: Start over with Step 2, only this time (and for every additional stitch), you will insert the right needle into the last stitch on the left needle. |
 |
Step 7: Continue repeating steps 2-5 until you have added the desired number of stitches. |
We even have a video tutorial to help you out. We hope you enjoy it!