You can make any project look even better by learning the simple technique of chain stitch embroidery. You'll notice below that the Kit of the Month is a set of Red, White, and Blue Dishcloths. Based on the day-of-the-week Organic Dishcloths that we designed last year, this set uses a slightly different technique for the embellishment: the Chain Stitch. Of course, I'd be lying if i told you that i knew how to do the Chain Stitch a few days ago... i didn't. But here's how i learned:
Just last week, I knit 3 different dishcloths and then crocheted borders around each of them. (Ok, did you notice the red and white border on the blue dishcloth? and the blue and white one on the red dishcloth? yep - that's my creativity screaming out loud and clear... get it? red, white, and blue on each one? Genius, i tell you! Ok, if i must be honest, i actually wasn't even clever enough to come up with that - while sitting in the kitchen, trying to figure out what colors to use for each border, doug suggested that i stick with the theme of "red, white, and blue." Oh. Good Idea. Darnit! Why didn't i think of that??).

Anyway, I brought the blank, but beautifully bordered, dishcloths into the store the other day - baffled as to how i could make them more festive. I knew i wanted stars or fireworks or something 'written' on them, but couldn't visualize what i wanted - or how to get there. Enter our most artistic knitter, Jeanne. Jeanne immediately scooped up the blank canvases and laid them on the counter to stare at. When she brought them back the next day, my jaw dropped - they were brilliant!! Now i just had to learn how to do it myself.
 | Step 1: Using a sharpie and some scratch paper, draw some stars and then cut them out. | |
 | Step 2: Pin the cut-out stars to your dishcloths. | |
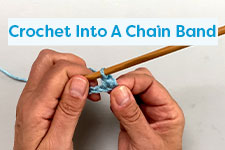
 | Step 3 (here's where it gets complicated): First, thread a tapestry needle with a few feet of yarn in the desired color. Working from the underside of the dishcloth, insert and pull the needle up through the stitch above one of the points. Now (the tricky/weird part), insert the needle back into the exact same stitch, but don't pull ALL of the yarn back through (leave a little loop of yarn) - then immediately insert and pull the needle up through a nearby stitch (that's what the picture shows). | |
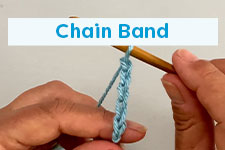
 | Step 4: At this point, the objective is to toss that little loop of yarn over the point of the needle and then pull the yarn taut. You're basically creating a sort of 'hitch' by: creating a loop of yarn, tossing that yarn over the point of the needle and then pulling on the needle until the yarn is secured. This photo shows the latter part of that process - the yarn had already been looped over the needle and now we're pulling it tight. | |
 | And here's the result (of doing it with both red and blue). Ok, I realize that these photos and descriptions are not terrific and i'll work on getting new ones up soon. In the meantime, you can really see what's happening by watching Jeanne in this youTube instructional segment on how to do chain stitch embroidery. It's only a few minutes long and she does a terrific job of explaining how the technique works. Thanks, Jeanne! | |
Here is Jeanne's Instructional video on how to do chain stitch embroidery:
<Posted by Jimmy (Laura) of Jimmy Beans Wool