Inspired by the kit of the month - and knitting with crushed crab - I set my sights on knitting Southwest Trading Company's French Garden Socks Kit (like the kit of the month, these socks are knit out of Tofutsies). The only problem? You have be an intermediate knitter - and know how to wrap and turn. Luckily, i work in a yarn shop, so have been able to perfect the technique after a few years - and am here to help you perfect it as well.
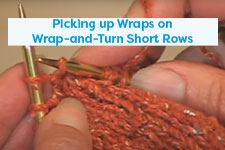
The Wrap and Turn (WT) technique is a handy shaping technique that gives a smoother edge and eliminates the need for picking up stitches that other shaping methods create. The directions might seem a little counterintuitive at first, but just read along carefully and trust me - you'll love this technique once you're familiar with it!
 | 1. On a knit row: with the yarn in back as if to knit, slip the next stitch purlwise. |
 | 2. Bring yarn to the front of your work. |
  | 3. Slip the slipped stitch back to the left needle and bring the yarn to the back of your work. |
 | 4. Turn the work and begin working your pattern back the other direction. This is the 'turn' part, and the part I found hardest to get used to! But don't worry, you'll come back to the wrapped stitch. |
 | 5. When it comes time to knit or purl past a wrapped stitch, you'll just knit or purl the two together. (If you miss this step you'll have an obvious hole in your work, but you'll notice it right away! On a purl row, you'll purl through the back loop of the wrap. The photo of is of purling through back of wrap.) |
| On a purl row, the steps are just about the same:
| |
| So, the next time you see wrap and turn referred to in a pattern, pull up a copy of this newsletter and let us guide you through it. That's what we're here for! | |
Posted by Ashley of Jimmy Beans Wool


